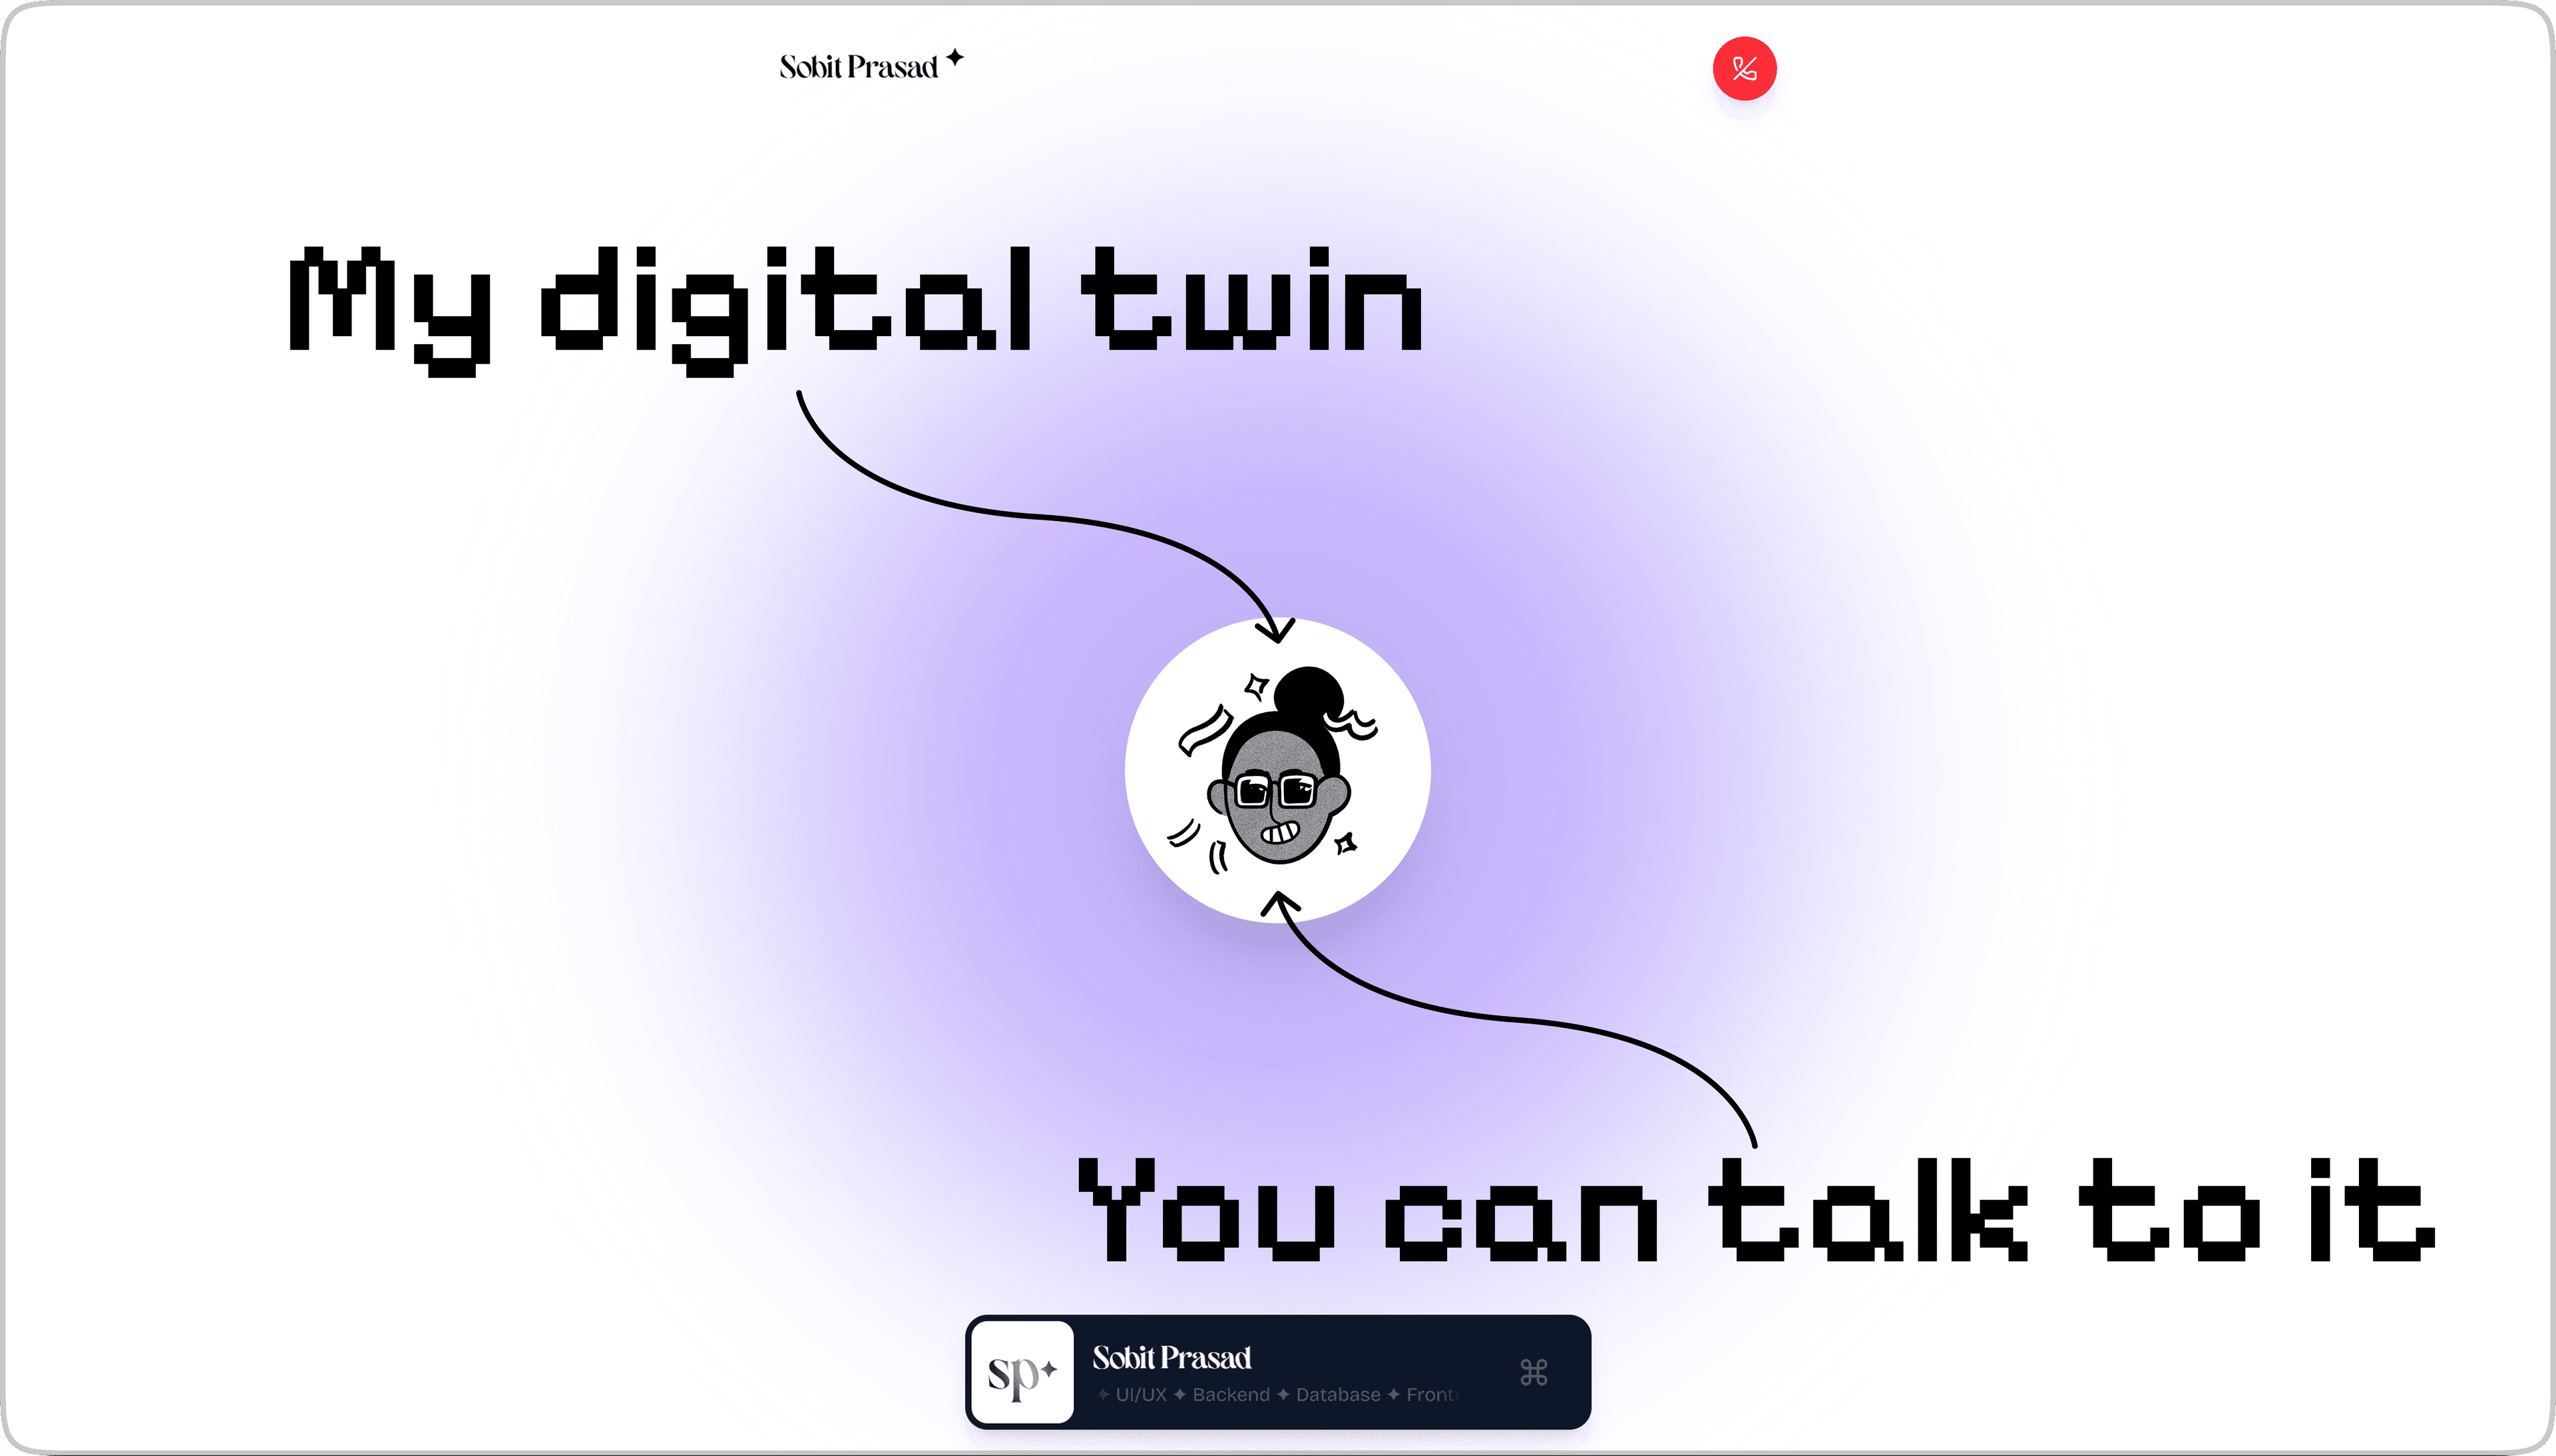
I Built a Voice-Controlled Digital Twin of Myself (And You Can Talk to It!)
Hey awesome reader, I am Sobit.
A Frontend Developer who likes to write sometimes and constantly seeks out innovative solutions to our day to day problems.
How It All Started
So here's the thing - I got tired of the same old portfolio websites. You know the ones: scroll, read, click, repeat. Boring.
I wanted something different. Something that would make people go "wait, what?" when they landed on my site. That's when I had this wild idea: what if people could just... talk to my portfolio? Like, actually have a conversation with it?
Fast forward a few weeks of research, and boom - I built a voice-interactive digital twin. Visitors can now chat with an AI version of me that knows everything about my projects, experience, and skills. No typing, no clicking buttons to record - just pure conversation.
In this article, I'll show you exactly how I built this thing, from the voice detection magic to the trippy visual effects that react to your voice. Spoiler alert: it involves machine learning, AI APIs, and some shader wizardry that would make your GPU sweat.
What you're about to learn:
How Voice Activity Detection works (and why it's cooler than it sounds)
Building a complete voice conversation pipeline without losing your sanity
Making WebGL shaders dance to your voice
Real problems I ran into and how I fixed them
Why my API bills went up (worth it though)
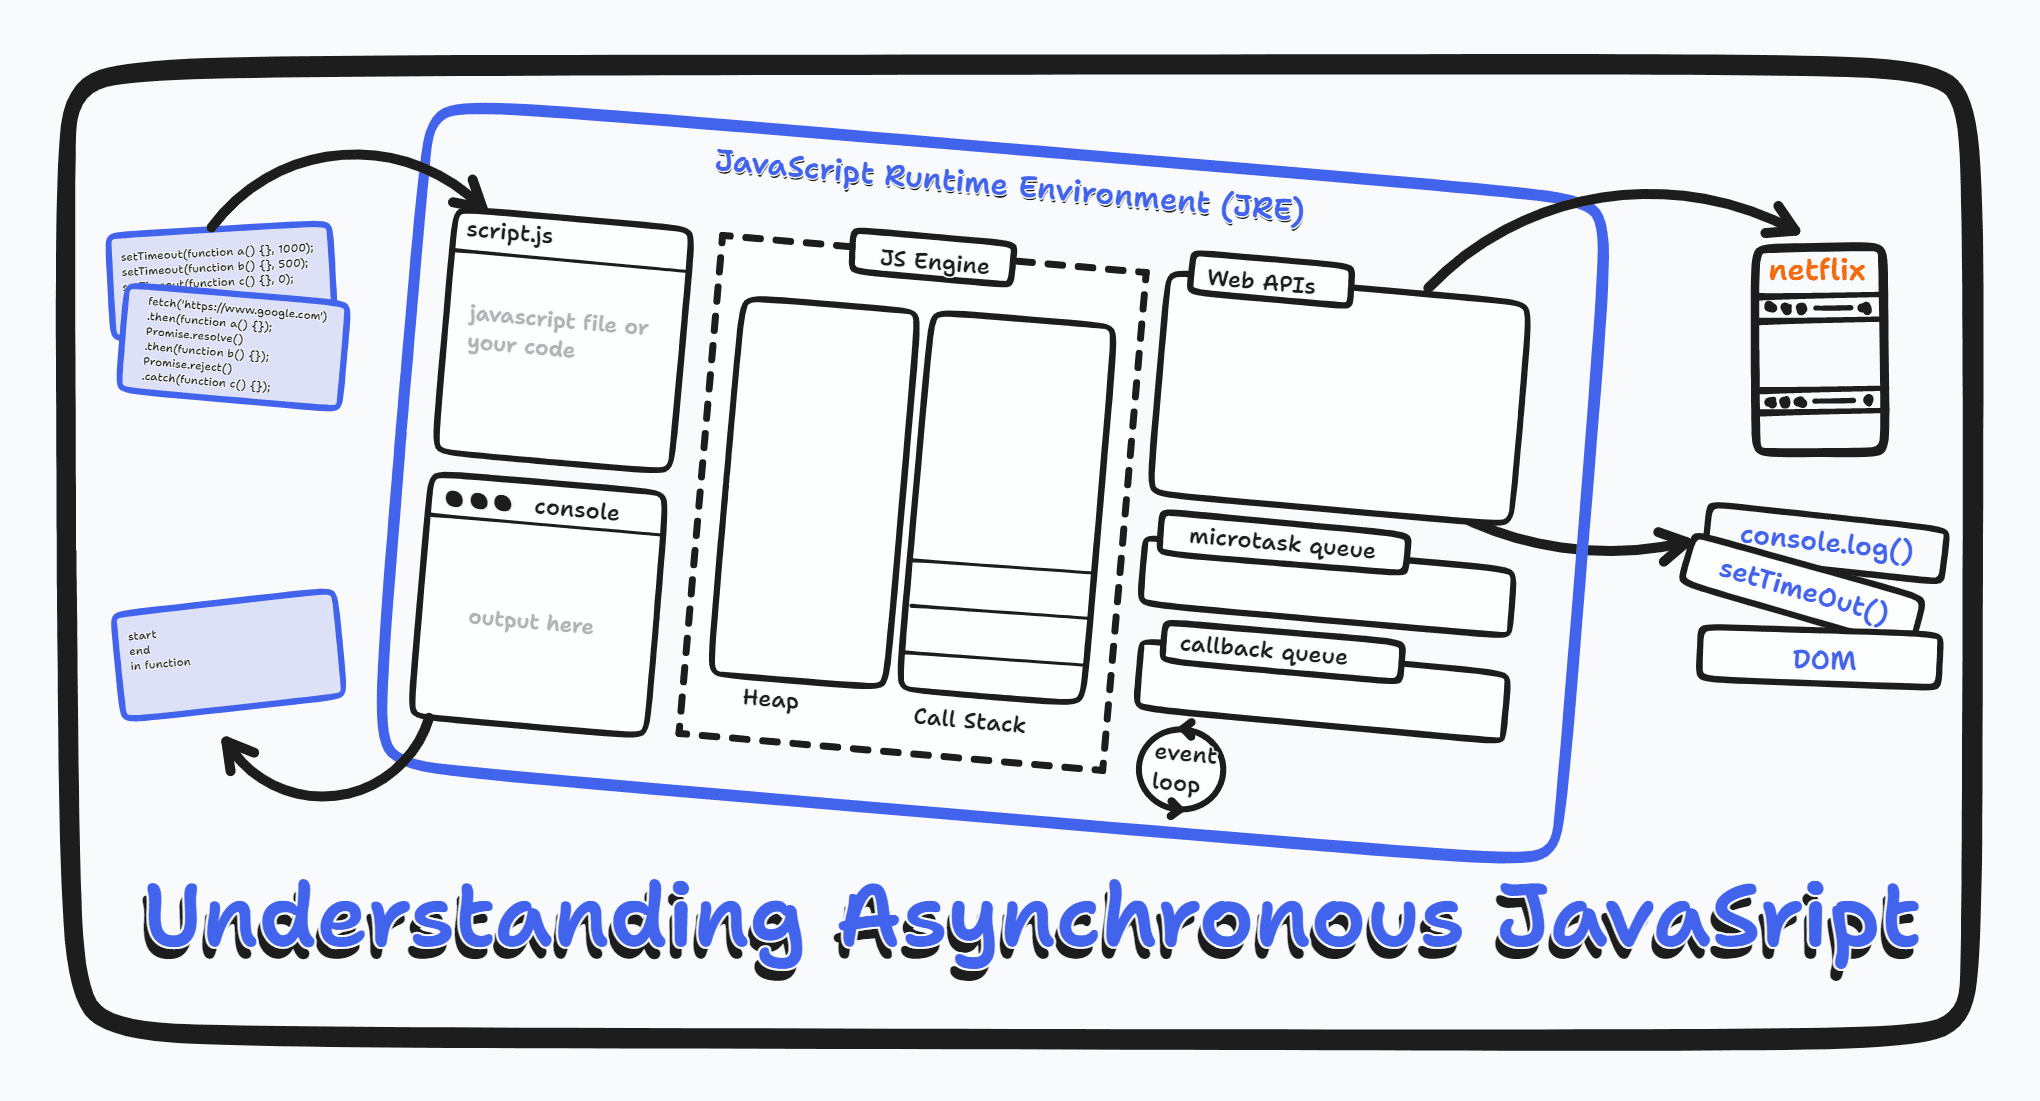
Wait, What's Voice Activity Detection?
Before we dive in, let me explain VAD (Voice Activity Detection) because it's the secret sauce that makes everything work.
Imagine you're on a Zoom call and the app knows exactly when you're talking. It's not just listening for "loud noises" - it's actually smart enough to tell the difference between you saying "hello" and your dog barking in the background. That's VAD in action.
VAD uses machine learning models trained on tons of audio data to detect actual human speech vs everything else:
Your mechanical keyboard clicking away
The ambulance siren outside
That Spotify playlist you forgot to pause
Your roommate yelling at their video game
Why This Matters
Here's the problem with traditional voice interfaces: they're annoying. You have to:
Click a button to start recording
Say your thing
Click another button to stop
Hope you didn't forget to click
It's like having to knock on someone's door, wait for them to answer, then knock again when you're done talking. Weird, right?
With VAD, the app just... knows. It hears you start talking, listens to what you say, and processes it when you're done. Hands-free. Magical. Just like talking to Alexa, but on a website.
The Tech Stack (AKA What I Glued Together)
Alright, let me show you the pipeline I built. It's basically a Rube Goldberg machine for voice, but it works beautifully:

The Tools I Used (And Why)
| What | Why I Picked It | The Real Reason |
| @ricky0123/vad-web | Runs VAD in the browser | No backend needed = less infrastructure to babysit |
| ONNX Runtime | Runs ML models in browsers | Makes the VAD work its magic |
| Google Gemini | Speech-to-text + AI chat | One API for two jobs = I'm lazy (efficiently) |
| ElevenLabs | Voice synthesis | Makes my digital twin sound less robotic |
| Three.js | Fancy graphics | Because static backgrounds are so 2010 |
| Next.js 15 | Backend stuff | Server functions are chef's kiss |
| React 19 | UI framework | Hooks make everything easier |
Building The Thing (The Fun Part)
Step 1: Getting VAD to Work
Setting up VAD was easier than I expected. Here's the basic setup:
import { useMicVAD } from '@ricky0123/vad-react';

const vad = useMicVAD({
  startOnLoad: false, // Don't be creepy, wait for permission

  // These CDN links load the ML models
  baseAssetPath: "https://cdn.jsdelivr.net/npm/@ricky0123/vad-web@0.0.27/dist/",
  onnxWASMBasePath: "https://cdn.jsdelivr.net/npm/onnxruntime-web@1.22.0/dist/",

  // Fine-tuning the detection
  positiveSpeechThreshold: 0.5,   // "Yep, that's definitely speech"
  negativeSpeechThreshold: 0.35,  // "Nope, not speech anymore"

  // The cool part - event callbacks
  onSpeechStart: () => {
    setConversationState('listening');
    // Time to pay attention!
  },

  onSpeechEnd: (audio: Float32Array) => {
    setConversationState('thinking');
    // Got your audio, now let me process it
    const audioBlob = float32ArrayToWavBlob(audio, 16000);
    processSpeechAudio(audioBlob, 'vad');
  },

  onVADMisfire: () => {
    setConversationState('idle');
    // False alarm, my bad
  },
});
The threshold thing: I set it to 0.5 to start listening and 0.35 to stop. This gap prevents the annoying flicker between "is talking" and "not talking" when you pause mid-sentence. Without it, every breath would trigger a stop. Trust me, I learned this the hard way.
Step 2: Making Visual Feedback That Actually Responds
One of the coolest parts was making the UI react to your voice in real-time. I built a custom hook that calculates how loud you're talking:
export function useVadEnergy() {
  const [vadEnergy, setVadEnergy] = useState(0);
  const [smoothedEnergy, setSmoothedEnergy] = useState(0);

  const vad = useMicVAD({
    startOnLoad: false,
    onSpeechEnd: (audio: Float32Array) => {
      // Math time! Calculate how loud the audio is
      let sum = 0;
      for (let i = 0; i < audio.length; i++) {
        sum += audio[i] * audio[i];
      }
      const rms = Math.sqrt(sum / audio.length);
      setVadEnergy(rms);
    },
    onVADMisfire: () => setVadEnergy(0),
  });

  // Smooth out the values so animations don't look jerky
  useEffect(() => {
    const interval = setInterval(() => {
      setSmoothedEnergy(prev => prev + (vadEnergy - prev) * 0.2);
    }, 50); // Update 20 times per second
    return () => clearInterval(interval);
  }, [vadEnergy]);

  return { vadEnergy: smoothedEnergy, vad };
}
This calculates something called RMS (Root Mean Square) energy, which is a fancy way of saying "how loud is this audio?" The smoothing part makes sure the animations don't spaz out when your voice volume changes suddenly.
Step 3: Audio Format Hell (Fun Times)
Okay, this part wasn't actually fun. It was terrible. But I figured it out!
The VAD library gives you audio as a Float32Array (basically an array of decimal numbers), but Google Gemini wants a WAV file. So I had to write a converter:
function float32ArrayToWavBlob(float32Array: Float32Array, sampleRate: number): Blob {
  // Create a buffer for the WAV file (44 bytes for header + audio data)
  const buffer = new ArrayBuffer(44 + float32Array.length * 2);
  const view = new DataView(buffer);

  // Helper to write strings into the buffer
  const writeString = (offset: number, string: string) => {
    for (let i = 0; i < string.length; i++) {
      view.setUint8(offset + i, string.charCodeAt(i));
    }
  };

  // WAV header stuff (this is standard WAV format)
  writeString(0, 'RIFF');
  view.setUint32(4, 36 + float32Array.length * 2, true);
  writeString(8, 'WAVE');
  writeString(12, 'fmt ');
  view.setUint32(16, 16, true);
  view.setUint16(20, 1, true);  // PCM format
  view.setUint16(22, 1, true);  // Mono
  view.setUint32(24, sampleRate, true);
  view.setUint32(28, sampleRate * 2, true);
  view.setUint16(32, 2, true);
  view.setUint16(34, 16, true); // 16-bit
  writeString(36, 'data');
  view.setUint32(40, float32Array.length * 2, true);

  // Convert the float samples to 16-bit integers
  for (let i = 0; i < float32Array.length; i++) {
    const s = Math.max(-1, Math.min(1, float32Array[i]));
    view.setInt16(44 + i * 2, s < 0 ? s * 0x8000 : s * 0x7FFF, true);
  }

  return new Blob([buffer], { type: 'audio/wav' });
}
Yeah, I know. It looks painful. Basically, I'm manually creating a WAV file header and converting floating-point audio to 16-bit integers. Took me way too long to get this right, but now it works perfectly.
Step 4: The Three-Stage Conversation Pipeline
Once I have the audio, it goes through three APIs:
Stage 1: Speech → Text
export async function POST(req: Request) {
  const formData = await req.formData();
  const audioFile = formData.get('audio') as File;

  try {
    // Try Gemini first (it's faster)
    const genAI = new GoogleGenerativeAI(process.env.GEMINI_API_KEY!);
    const model = genAI.getGenerativeModel({ model: "gemini-2.5-flash" });

    const audioData = await audioFile.arrayBuffer();
    const base64Audio = Buffer.from(audioData).toString('base64');

    const result = await model.generateContent([
      {
        inlineData: {
          mimeType: 'audio/wav',
          data: base64Audio
        }
      },
      'Transcribe this audio to text. Return only the transcription.'
    ]);

    return NextResponse.json({ transcript: result.response.text().trim() });

  } catch (error) {
    // Gemini failed? No problem, Whisper to the rescue
    const openai = new OpenAI({ apiKey: process.env.OPENAI_API_KEY });
    const transcription = await openai.audio.transcriptions.create({
      file: audioFile,
      model: 'whisper-1',
    });
    return NextResponse.json({ transcript: transcription.text });
  }
}
I use two providers because sometimes APIs have bad days. Gemini is faster, but if it fails, Whisper is super reliable.
Stage 2: AI Chat Response
This is where the "digital twin" part comes in. I built a knowledge base with all my info:
export async function POST(req: Request) {
  const { message, sessionId } = await req.json();

  // Search my knowledge base for relevant info
  const relevantInfo = searchKnowledge(message);

  const genAI = new GoogleGenerativeAI(process.env.GEMINI_API_KEY!);
  const model = genAI.getGenerativeModel({
    model: "gemini-2.5-flash",
    systemInstruction: `You are Sobit, a full-stack developer...

    VOICE MODE RULES (because nobody wants to hear a 5-minute response):
    - Keep it short - 2-4 sentences max
    - Aim for 15-30 seconds when spoken out loud
    - Be conversational, like you're chatting with someone
    - No bullet points (they sound weird when spoken)

    HERE'S WHAT'S RELEVANT:
    ${relevantInfo}`
  });

  const result = await model.generateContent(message);
  return NextResponse.json({ response: result.response.text() });
}
The knowledge base (portfolio-knowledge.ts) is just a big JSON object with everything about me - projects, skills, experience, etc. When someone asks about my projects, the AI gets that context and can answer accurately.
Stage 3: Making It Sound Human
Finally, I turn the AI response into speech using ElevenLabs:
export async function POST(req: Request) {
  const { text } = await req.json();

  const client = new ElevenLabsClient({
    apiKey: process.env.ELEVENLABS_API_KEY
  });

  const audio = await client.textToSpeech.convert(
    process.env.ELEVENLABS_VOICE_ID!,
    {
      text,
      model_id: "eleven_turbo_v2_5",
      voice_settings: {
        stability: 0.5,        // Not too robotic, not too wild
        similarity_boost: 0.5,  // Keep it consistent
        style: 0.0,            // Neutral tone
        use_speaker_boost: true // Make it clear
      }
    }
  );

  // Convert the audio stream to base64
  const chunks: Uint8Array[] = [];
  for await (const chunk of audio) {
    chunks.push(chunk);
  }
  const audioBuffer = Buffer.concat(chunks);
  const base64Audio = audioBuffer.toString('base64');

  return NextResponse.json({
    audio: base64Audio,
    mimeType: 'audio/mpeg'
  });
}
The voice settings took some tweaking. Too much stability and it sounds like a robot. Too little and it sounds drunk. 0.5 is the sweet spot.
Step 5: State Management (Keeping Track of What's Happening)
I use a simple state machine to track the conversation:
type ConversationState = 'idle' | 'listening' | 'thinking' | 'speaking';
The flow looks like this:
idle ──[you start talking]──► listening listening ──[you stop talking]──► thinking thinking ──[AI responds]──► speaking speaking ──[audio ends]──► idle (and back to listening)
Each state changes the UI colors, animations, and that glowing effect around the avatar. Makes it feel alive.
The Visual Magic (AKA The Fun Stuff)
The boring version would've been a static page with a microphone icon. But I wanted something that felt reactive - like the page was actually listening to you.
1. The Trippy Background Shader
I built a WebGL shader that creates this cloud-like effect that literally moves with your voice:
const fragmentShader = `
uniform float u_time;
uniform float u_voice_intensity;  // How loud you're talking (0-1)
uniform int u_conversation_state;  // What state we're in

// This creates organic, cloud-like patterns
float noise(vec2 p) {
  return fract(sin(dot(p, vec2(12.9898, 78.233))) * 43758.5453);
}

// Layer multiple noise patterns for complexity
float fbm(vec2 p) {
  float value = 0.0;
  float amplitude = 0.5;
  for(int i = 0; i < 5; i++) {
    value += amplitude * noise(p);
    p *= 2.0;
    amplitude *= 0.5;
  }
  return value;
}

void main() {
  vec2 uv = vUv;
  vec2 p = uv * 3.0 + u_time * 0.1;

  // HERE'S THE COOL PART - your voice distorts the pattern
  float distortion = u_voice_intensity * 0.3;
  p.x += sin(p.y * 10.0 + u_time) * distortion;
  p.y += cos(p.x * 10.0 + u_time) * distortion;

  float clouds = fbm(p);
  float voiceReaction = smoothstep(0.3, 0.7, clouds + u_voice_intensity * 0.5);

  // Pick colors based on what's happening
  vec3 baseColor;
  if(u_conversation_state == 0) baseColor = u_color_idle;
  else if(u_conversation_state == 1) baseColor = u_color_listening;
  else if(u_conversation_state == 2) baseColor = u_color_thinking;
  else baseColor = u_color_speaking;

  // Add a glow in the center that gets brighter when you talk
  float centerGlow = 1.0 - length(uv - 0.5) * 2.0;
  centerGlow = pow(centerGlow, 2.0) * u_voice_intensity;

  vec3 finalColor = mix(baseColor, baseColor * 1.5, voiceReaction);
  finalColor += vec3(centerGlow * 0.3);

  gl_FragColor = vec4(finalColor, 1.0);
}`
;
Every frame, I update the u_voice_intensity value based on your voice volume. The shader uses that to distort the cloud pattern. Louder voice = more distortion. It's mesmerizing to watch.
2. Pulsing Circles Around the Avatar
Three concentric circles that pulse and rotate:
const circles = [
  { delay: 0, scale: 1 },
  { delay: 3, scale: 1.1 },
  { delay: 6, scale: 1.2 },
];

return circles.map((circle, i) => (
  <motion.div
    key={i}
    className="absolute rounded-full border-2"
    animate={{
      scale: [1, 1.05 + (micVolume * 0.4), 1],  // Breathes with your voice
      opacity: [0.25, 0.5 + (micVolume * 0.5), 0.25],  // Pulses
      rotate: 360,  // Spins continuously
    }}
    transition={{
      duration: 8 + i * 3,  // Each circle rotates at different speeds
      repeat: Infinity,
      ease: 'easeInOut',
      delay: circle.delay,
    }}
  />
));
When you talk, they scale up. When you're quiet, they shrink. The colors change based on the conversation state:
Green when listening
Yellow when thinking
Purple when speaking
3. The Avatar Itself
The profile picture scales and glows:
<motion.div
  animate={{
    scale: conversationState === 'listening' ? 1.05 :
           conversationState === 'speaking' ? 1.02 : 1,
    boxShadow: conversationState === 'listening'
      ? '0 0 50px rgba(59, 130, 246, 0.3)'  // Blue glow
      : conversationState === 'speaking'
      ? '0 0 50px rgba(168, 85, 247, 0.3)'  // Purple glow
      : conversationState === 'thinking'
      ? '0 0 50px rgba(234, 179, 8, 0.3)'   // Yellow glow
      : 'none',
  }}
>
  <Image src="/sobit.jpg" alt="Avatar" />
</motion.div>
Simple but effective. The glow color tells you exactly what's happening without reading any text.
Problems I Ran Into (And Fixed)
Problem 1: "Can I Use Your Mic?" Popup Hell
Modern browsers won't let you access the microphone without a user action (good for privacy, annoying for UX). I had to add a big "Start Conversation" button that triggers the mic request:
const handleStart = async () => {
  try {
    await vad.start();
    setIsListening(true);
  } catch (error) {
    // User said no or browser blocked it
    console.error('Microphone access denied:', error);
  }
};
Problem 2: "Why Is There A 5 Second Delay?"
At first, the response time was terrible. Like 7-10 seconds bad. I fixed it by:
Using Gemini 2.5 Flash (way faster than the regular model)
Telling the AI to keep responses short (2-4 sentences)
Using ElevenLabs Turbo v2.5 for faster voice generation
Now it's 2-4 seconds from when you stop talking to when you hear the response. Much better.
Problem 3: Conversation Context
APIs are stateless, which means each request is treated like a brand new conversation. The AI would forget what we just talked about. I fixed this with session-based caching:
const conversationCache = new Map<string, Message[]>();

export async function POST(req: Request) {
  const { message, sessionId } = await req.json();

  // Load previous messages
  const history = conversationCache.get(sessionId) || [];

  history.push({ role: 'user', content: message });
  const response = await generateResponse(history);
  history.push({ role: 'assistant', content: response });

  // Save for next time
  conversationCache.set(sessionId, history);

  return NextResponse.json({ response });
}
Now the AI remembers the whole conversation. In production, I'd use Redis or a database, but for now this works.
Problem 4: Mobile Phones Hate Me
Running ONNX models and WebGL shaders on a phone made it laggy. Solution: detect mobile devices and simplify the effects:
const isMobile = /iPhone|iPad|iPod|Android/i.test(navigator.userAgent);
const shouldUseShaders = !isMobile && window.WebGL2RenderingContext;
Mobile users get simpler animations, desktop users get the full visual experience.
How It Performs in the Real World
After launching this thing:
VAD Accuracy:
95%+ accuracy detecting speech
Less than 5% false positives (usually from very loud noises)
Speed:
Speech end → Transcript: 1-2 seconds
Transcript → AI response: 0.5-1 second
Response → Audio playback: 1-2 seconds
Total: 2.5-5 seconds (feels pretty instant)
User Engagement:
People stay 3x longer than on my old static portfolio
70% of visitors try the voice feature
Average 4-5 questions per session
Browser Support:
Works perfectly on Chrome, Firefox, Safari, Edge (desktop)
Works well on mobile Chrome and Safari (with reduced visuals)
What I'd Add Next
I've got some ideas for v2:
Actual 3D Avatar with Lip Sync
Use Ready Player Me for a 3D model
Make it actually mouth the words
Add facial expressions
Emotion Detection
Analyze the tone of your voice
Adjust the AI's personality (sympathetic, excited, etc.)
Change the visual vibe to match
Multi-Language Support
Auto-detect what language you're speaking
Respond in the same language
ElevenLabs supports 29+ languages
Conversation Analytics
Track what people ask about most
See which projects get the most interest
Use it to improve the knowledge base
Voice Options
Let users pick from different voice styles
Adjust speed and personality
Make it more personalized
Final Thoughts
Building this was one of the most fun projects I've done. It combines so many cool technologies - machine learning for VAD, AI for conversation, voice synthesis for speech, and WebGL for visuals.
A few years ago, this would've been impossible (or at least required a massive backend infrastructure). Now? Everything runs in the browser using modern web APIs and cloud services. The entire pipeline - from detecting your voice to playing a response - happens in seconds.
The craziest part? Most visitors don't even realize how complex it is. They just click "Start," ask a question, and get an answer. That's the dream - complex tech that feels simple and magical.
If you're thinking about adding voice features to your projects, I hope this gives you a starting point. VAD libraries like @ricky0123/vad-web make it way easier than building from scratch, and modern AI APIs are fast enough for real-time conversation.
The future of web interaction is conversational. The tools are ready. Go build something cool.
Resources & Links
Try it yourself: sobitprasad.com/chat
Tech I used:
@ricky0123/vad-web - VAD library
Google Gemini - AI brain
ElevenLabs - Voice synthesis
Three.js - Graphics
Next.js - Framework
Framer Motion - Animations
Useful reads: